Red Team: hacking Wonderland (TryHackMe CTF room)
This is a walkthrough for the CTF (Capture the flag) room on TryHackMe.com, called “Wonderland”.
I consider CTF rooms to be a very useful practice and learning/teaching tool for anyone who wants to learn or teach how to hack (ethically, of course), and also for
improving Cybersecurity knowledge and understanding.
TryHackMe is a great website for this, you can use virtual machines that run directly in your browser to get
hands-on practice and complete CTFs, like I did for this one.

ーName: Wonderland
ーDifficulty: Medium
ーReleased: Fri 05 Jun 2020
ーTools and techniques used: nmap, ffuf or gobuster, steghide, Ghidra, LinPEAS, Linux privilege escalation (python, perl with Capabilities set)
Let's get started with Wonderland. Once you start the machine by clicking the “Start Machine” green button
(on the TryHackMe Wonderland room webpage), you will be provided with an IP address: that's the vulnerable machine we're
trying to compromise, and that's where we'll be hunting for our flags.

Enumeration
The first thing we want to do is perform Enumeration and perform an initial scan of the network, and this is usually done with specific tools such as nmap.
Nmap is used to discover hosts and services on a computer network by sending packets and analyzing the responses; based on the scan results we can plan
our next moves, which is why we start with nmap.
In our case we want to do a script scan (with default values), probe open ports to determine service and version info, and lastly output the results in a file
(in this case called nmap.out). Outside of the last option which can be skipped, the rest of the options are pretty standard and they seem to work well for this CTF.
We can perform the scan with following command:
sudo nmap -sC -sV -oN nmap.out {target ip}
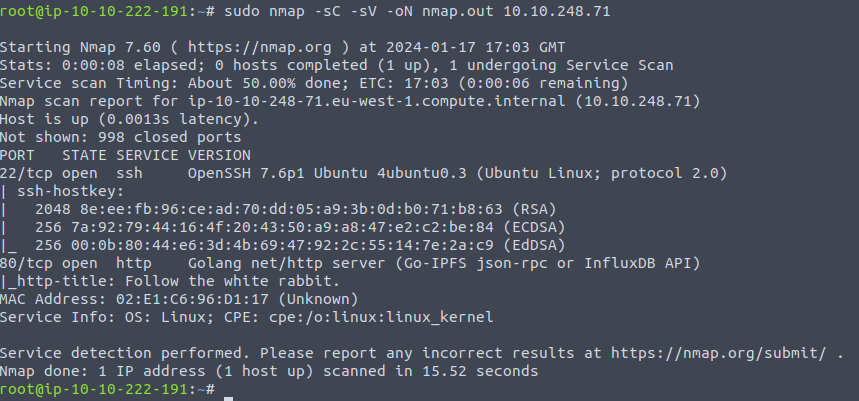
We can see that only two ports are open, 22 (for ssh) and 80 (for http). Since we don't have credentials
for ssh, let's go to our web browser and visit the webpage by using the machine IP.
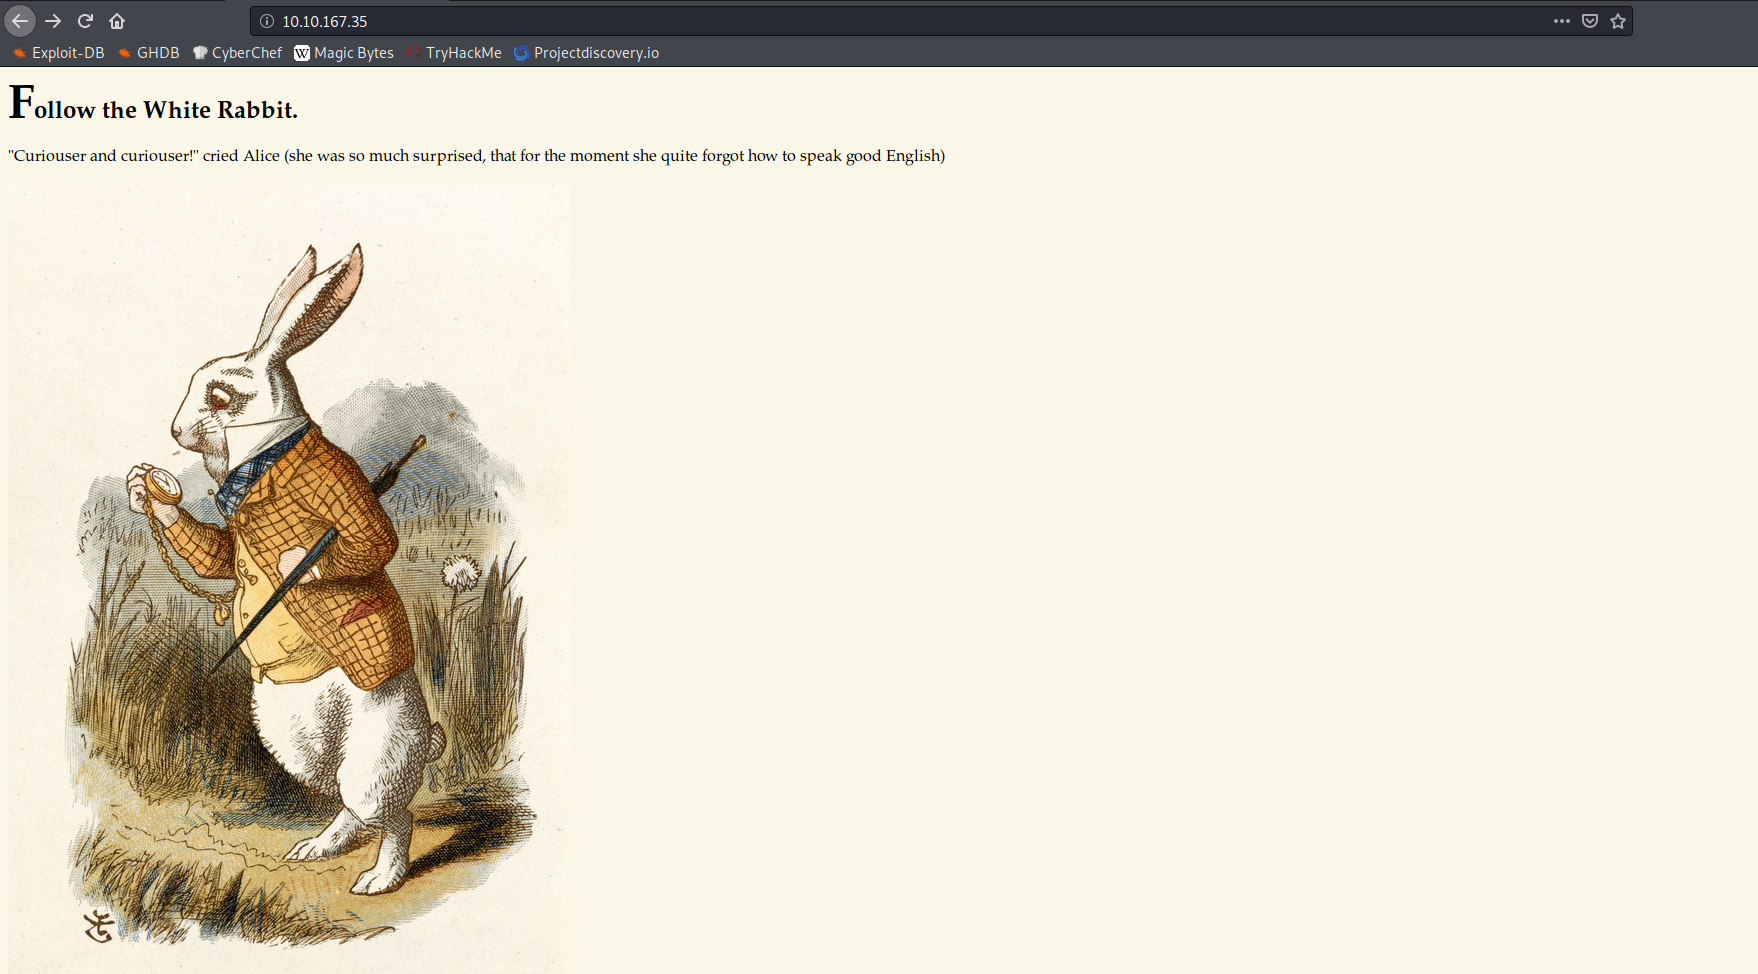
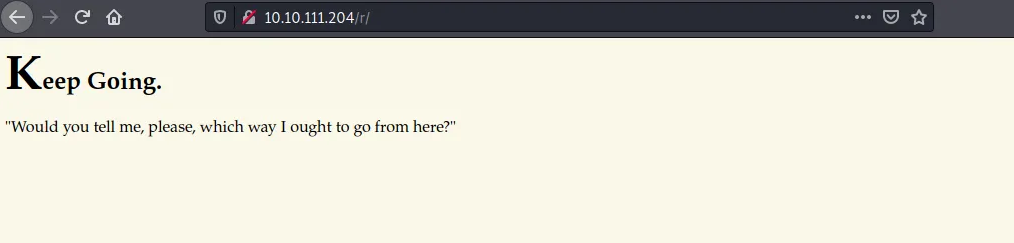
We find a page that's hinting at the whole “Alice in Wonderland” theme, but after inspecting the page source we
don't see anything useful that could aid us in compromising this machine.
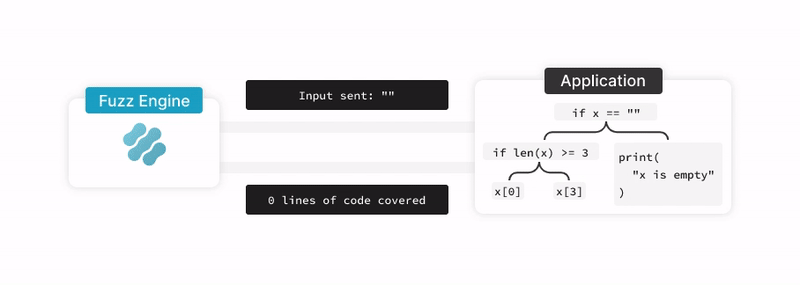
At this point we're going to use another tool, ffuf, to "fuzz" the website, and also to scan for (possibly hidden) directories and files.
Ffuf is a popular fuzzing tool, and “fuzzing” (or fuzz testing) is an automated software testing method that
injects unexpected or invalid inputs into a system to discover potential vulnerabilities. After injecting
these inputs into the system the fuzzing tool looks for exceptions such as crashes or information leakage,
that could potentially lead to the discovery of a vulnerability. One example of this could be fuzzing a
login form with random inputs, to see if we can crash the web application or get unexpected errors.
Here's an image that shows how fuzzing works in simple terms:
ffuf (Fuzz Faster U Fool) is a very useful tool that automates the process of fuzzing, it's designed
for security professionals and makes their job easier by helping them find vulnerabilities.
What ffuf does first is sending a large number of requests to a target with various payloads, then it analyzes
the responses and tells us what worked and what didn't; in our case, we're going to use ffuf to perform
a Directory brute force. For this, we need to provide two inputs, one is the URL (-u) of the target website, and the other one
is a wordlist (-w):
ffuf -u http://example[.]com/FUZZ -w wordlist.txt
You can also see that the URL has the FUZZ placeholder at the end, this will be replaced with the words in the
wordlist so that ffuf can run through all those words and give results based on what it finds.
To fuzz our “Wonderland” machine, let's run the following ffuf command (feel free to change the wordlist to any
of your choice, and be sure to type the correct path to the wordlist after “-w”) and see the results we get:
ffuf -u http://machine-ip-here/FUZZ -w /usr/share/wordlists/dirbuster/directory-list-2.3-medium.txt

Note: instead of ffuf you can also use another tool, called gobuster, to get very similar results.
After using ffuf, we got quite a few results, so let's poke around a bit and see if there's anything hidden
that's going to help us find the flags. For example, let's check this “white rabbit” image to see if something
is hidden inside it. Let's use the following wget command to download the image:
wget http://machine-IP/img/white_rabbit_1.jpg
After downloading it, let's use another tool, called Steghide, to see if there's any data that could be
extracted from the image. Steghide is a steganography tool that can hide (or extract) files within an
image or audio file; it supports a lot of different image and audio formats.
Let's try running the following command: steghide extract -sf white_rabbit_1.jpg
If we use the cat command to read what was extracted from steghide (which saves its result on a txt file), we get the
following message: “ follow the r a b b i t ”
While still staying on theme with Alice in Wonderland, this message seems to be hinting at some URL, by saying
“follow”, and the URL might as well be “r a b b i t”.
After the fuzzing we did before, we also found an interesting directory named “/r”, and if we try to check it
on the webpage this is what we get:
At this point, if we run another “fuzz” with either ffuf or gobuster on the /r webpage, we get another directory
named “/a”. See where this is going? It's spelling the word rabbit. Let's then go directly to the last page that
this is pointing us to, by typing /r/a/b/b/i/t in the address bar:
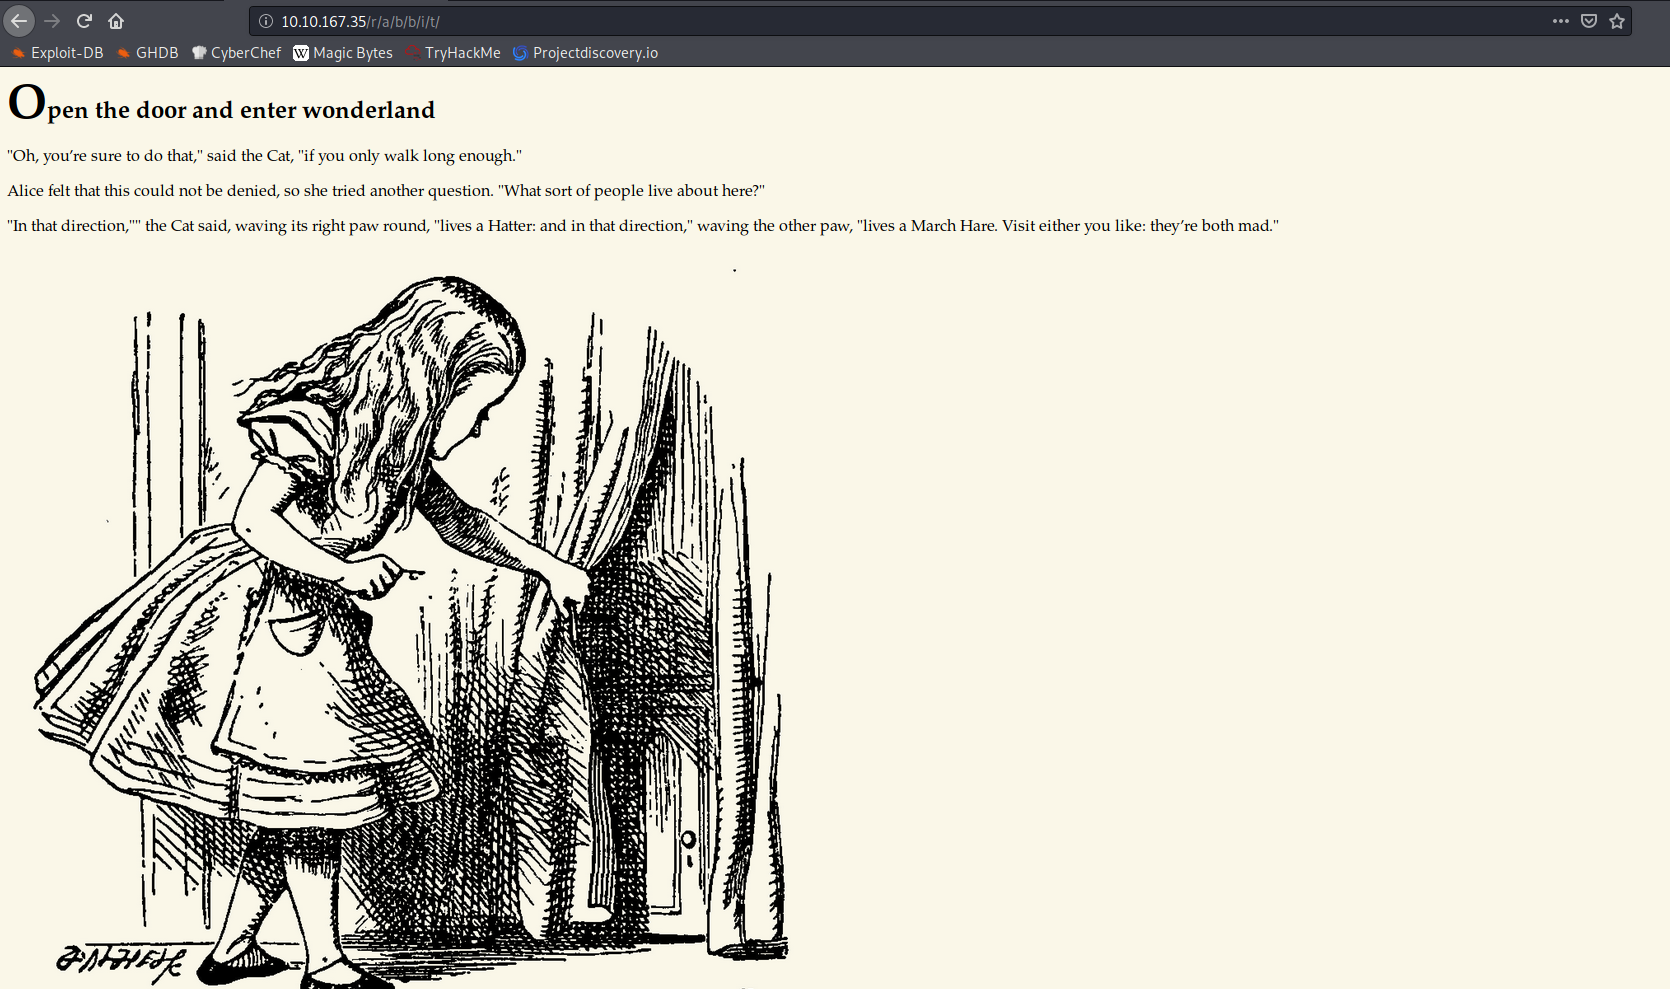
Looks like we're getting somewhere. Let's check out the source code:

That looks like some credentials! Remember that with our initial scan we found out that port 22 (SSH)
was open? Let's try these credentials and connect to the machine with SSH.
Sure enough, it works.
Looking for our first flag
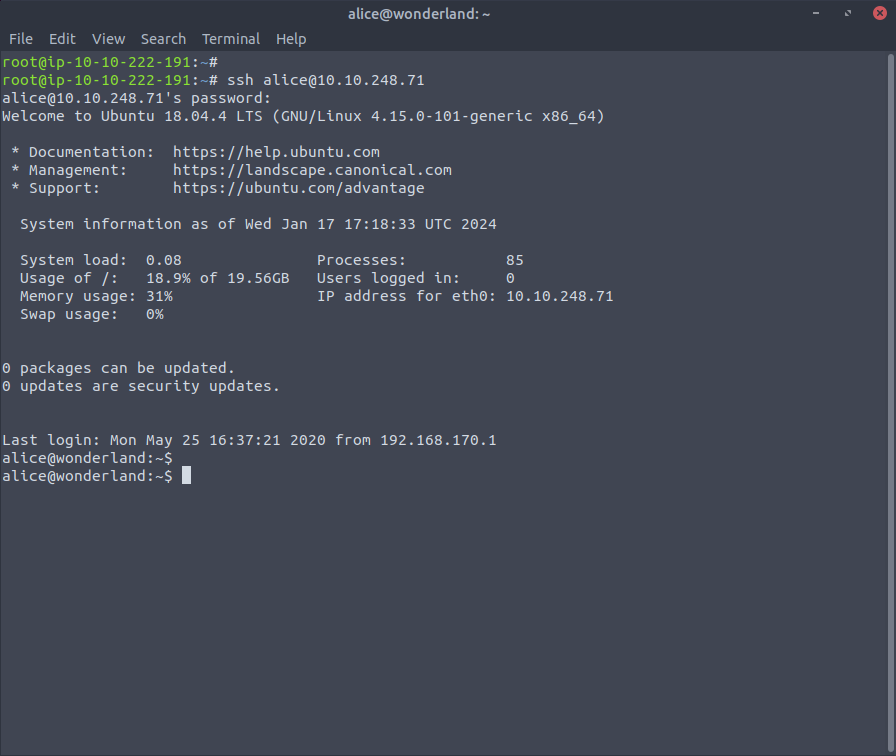
With our credentials we can connect to the machine through ssh and get a shell, and we're one step closer to
finding the two flags that have been hidden in this machine.
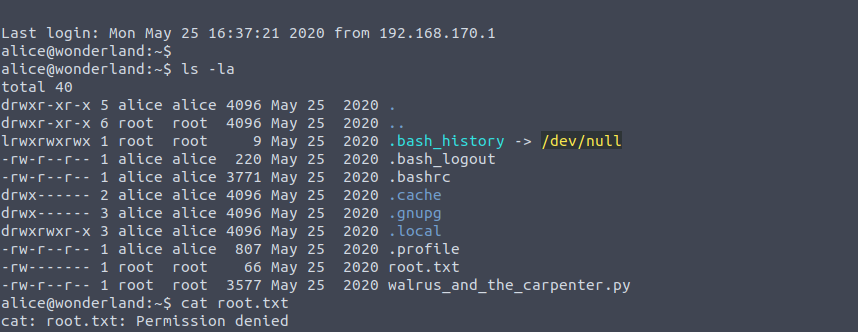
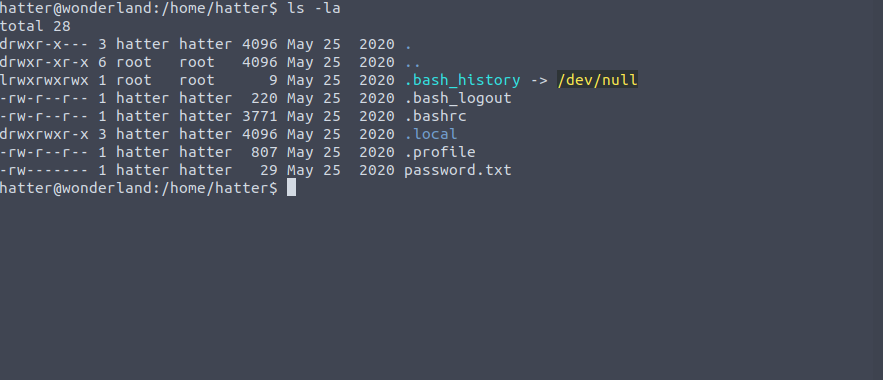
At this point let's run the command ls -la to see what's on this machine. Alice's home directory has two
files worth nothing: one named root.txt which we don't have read access to (we'll get back to this one later), and
a python script called walrus_and_the_carpenter.py.
This however is not all, if we try to look around a bit we find that there's a “user.txt” text file in
the /root directory, and if we try to read it with the cat command we get our first flag!
Privilege escalation
Now we need to get the last flag, and in order to read this one we need root privileges: in other words, we need to
find a way to escalate our privileges.
Remember that just now we also found a python file (walrus_and_the_carpenter.py) in Alice's home directory, and if
we look at our privileges with sudo -l (to see what we can run with the sudo command) we can see the
following:
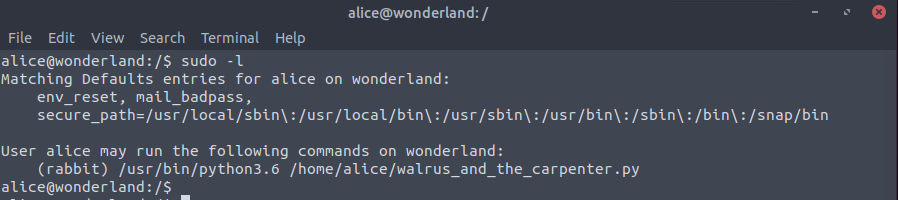
We see that we can run walrus_and_the_carpenter.py too see what it's doing. Even though we only have read access to it
and can't edit the file, let's see what we discover:
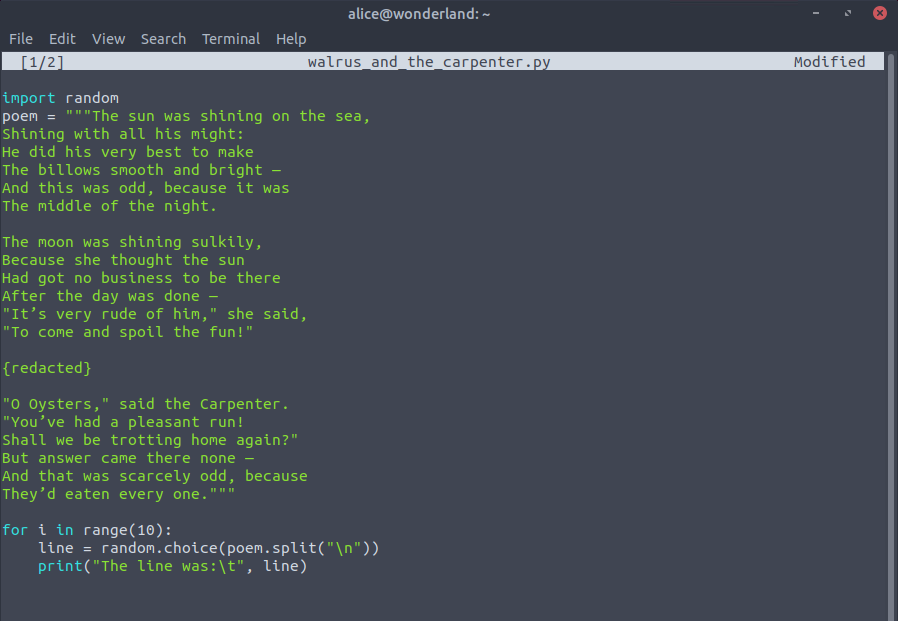
We see at the top of the script that the random module is being imported (it's a built-in module that you can use
to generate random variables, such as random numbers). What we can do here is write a very simple python script,
called “random.py”, in the current working directory, so that it gets loaded instead of the actual random module.
What do we want to do with our random.py script? We want to escalate our privileges to one of the other users present on the machine, so we want to get a shell with it
and consequently have access to that user's directories.
Here's the random.py script used for that:
								import os
								os.system("/bin/bash")
The way this works is that if any of the search paths specified in the python script are world writable, they're vulnerable to
privilege escalation, as placing a file in one of these directories with a name that matches the requested library
will load that file (which could be our “malicious” file), assuming it's the first occurrence.
To test this, when we run the walrus py file, with the command “sudo -u rabbit /usr/bin/python3.6 /home/alice/walrus_and_the_carpenter.py”
(so we try to run it as the rabbit user), we can see that we successfully escalated our privileges to the user called
rabbit.
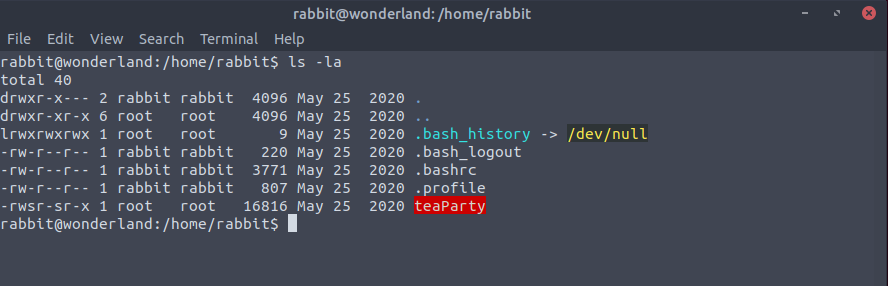
Let's then take a look at the /home/rabbit/ directory to find something that could be useful. We find
a setuid binary (called teaParty), which looks a bit suspicious. After trying various ways to see its code and possibly find any vulnerability,
we try to use a reverse engineering tool such as Ghidra, and we discover that it's a C compiled binary and that the date is
executing without an absolute path being specified:
We can make use of this setuid binary in the rabbit user directory in a clever way, to further escalate our privileges by getting a shell with
another user.
Setuid and setgid are a way for users to run an executable file with the permissions of the user (setuid)
or group (setgid) who owns the file. These are very useful when you need some users to execute files with root
privileges, but don't want to give them sudo or root access (for obvious security reasons). One very common example
for this is to let users run the passwd command with root privileges, so that they can change their own password.
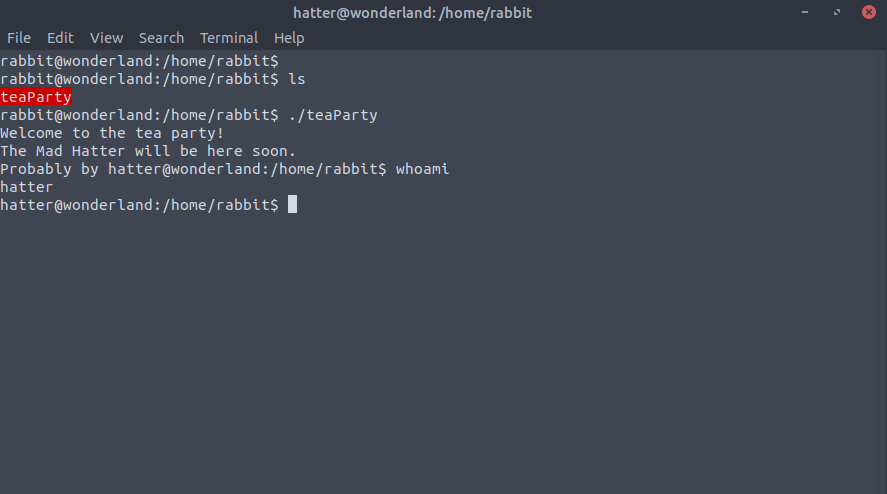
To exploit the teaParty setuid binary, we first export our own path, then write our own “date file”, which gets used when running the
binary, this way we should get a shell and escalate our privileges.
To export our own path (defined as $PATH) we simply type “export PATH=/tmp:$PATH” in our terminal,
then “echo $PATH” to print it out and confirm that we did it correctly. Now, once we run the script, since it doesn't specify
an absolute path, the binary will first look in the /tmp directory.
Next, we create a very simple shell script called date, place that in /tmp and make it executable by
running the command “chmod +x /tmp/date”. The command chmod is used to set or change permissions
for the files and directories within your system.
The shell script “date” contains the following code (it simply invokes a shell):
								#!/bin/bash
								/bin/bash
This works in that the binary teaParty looks for specific Paths in order when calling the programs echo and date,
so if we can create a malicious script in a directory that we have write access to and add that directory
to our path (and our path should be before /bin/) we can trick the program into executing our own script rather
than the real one.
What's left to do at this point is to run the binary, and we should be able to escalate our privileges to
the user called “hatter”. We're almost at the point of getting root access, and the last flag
along with it.
By looking in the home directory of the user hatter, we find a password in clear text, which we can use to connect
with SSH and get a complete connection as that same user.
Now after doing some more basic enumeration with tools like LinPEAS, which is a script that searches for
possible paths to escalate privileges on Linux/Unix hosts, we find out that the user hatter has some
Capabilities set up with perl, a widely-used programming language. One method administrators can use
to increase the privilege of a process (or binary) is called “Capabilities”. For example,
if the system administrator does not want to give a certain user higher privileges, but that user needs
higher privileges to use a specific tool/binary, the administrator can then change the Capabilities of
the binary. As a result, the binary could be used without needing a higher privilege user. This is comparable to
the setuid and setgid we mentioned earlier, they're both similar solutions to the same problem,
although Capabilities is a more granular and safer approach, if configured correctly, which also reinforces the core principle of
Least Privilege: you should only give users the least amount of privilege they need to perform their tasks, nothing more.
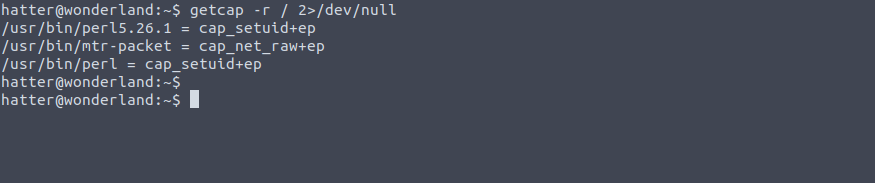
In order to check our current user enabled Capabilities, we use the following command: getcap -r / 2>/dev/null
getcap is a tool that lists enabled Capabilities, but when run as an unprivileged user, “getcap -r /” will generate
a huge amount of errors, it's then good practice to redirect the error messages to /dev/null so that
they get erased.
Note that the “2>” is a special use of the > operator, in short “2>” redirects stderr
(standard error) to whichever file or location you specify, in this
case /dev/null (the so-called “black hole”).
After running that command, we discover that perl has the following Capabilities set up:
/usr/bin/perl = cap_setuid+ep
The cap_setuid+ep means that all privileges are assigned to the user for that program, the “+ep” specifically means that the capability is set as effective and permitted.
This is very exploitable.
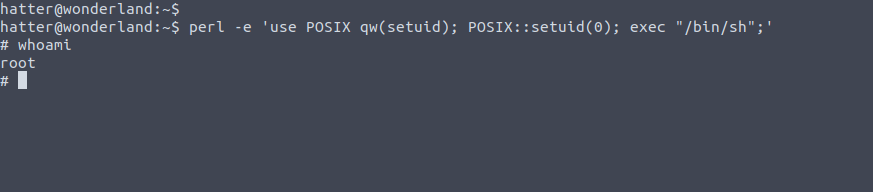
We can exploit this and finally escalate to root. The short script used in the second screenshot above (which
allowed us escalate to root by abusing the set Capabilities) is taken from GTFObins, an incredibly useful
website-repository for all sorts of scripts and things related privilege escalation, reverse shells and more),
see the following link: GTFObins Capabilities .
With this, we get root privileges and we're able to read and submit the final flag, root.txt!
This concludes the Wonderland CTF, it has quite a few different ways to compromise the machine and escalate privileges, and we use
a variety of tools to ultimately achieve root level privilege. Even for beginners, CTFs are a great way to practice and learn
hacking, penetration testing and all the different techniques testers (or malicious actors) could employ.